


Minecraft, a game that has been cherished by millions worldwide and over 900,000 concurrent players across all platform it supports. With Minecraft vast universe are left for players to explore. While the vanilla version of the game is captivating, the real magic often lies in the mods that players can integrate into their game. This article will tackle on how to install Minecraft Forge to your PC or MacOS device.
Minecraft Forge is popular modding API that opens the gates to a world of infinite possibilities. Craft and enchant new tools, battle ferocious mobs, and build like never before with thousands of mods to choose from. These mods can introduce new worlds, items, and blocks, taking the gameplay experience to an entirely whole new level.
However, to manage and use these mods, players often turn to Minecraft Forge, a modding API. If you’re new to this or need a refresher, this guide will walk you through the process of installing Minecraft Forge step by step.
Step 1: Downloading Minecraft Forge 2026
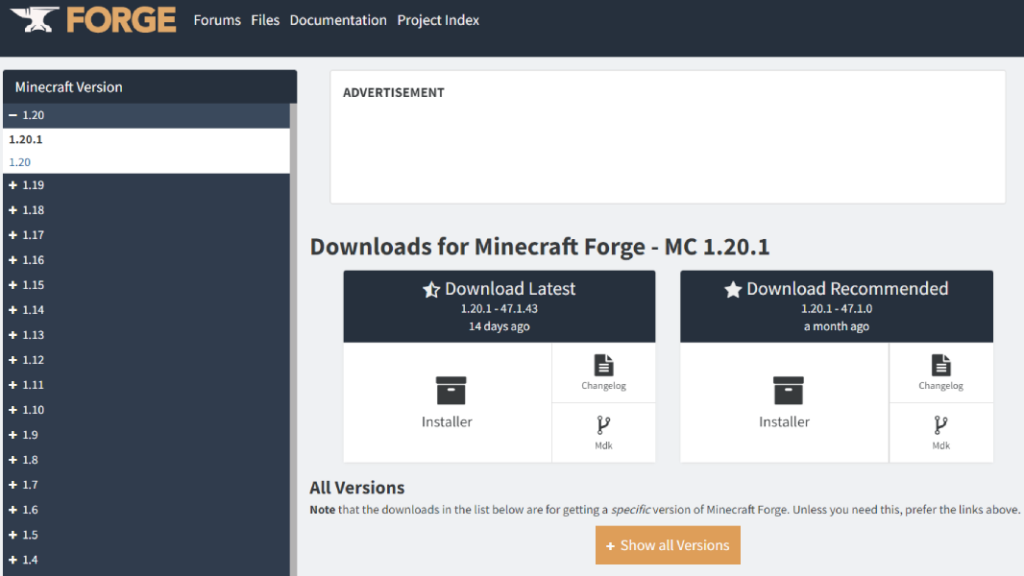
- Hover to the official Minecraft Forge website (https://files.minecraftforge.net/net/minecraftforge/forge/).
- On the left side, select the latest version of Minecraft that you want to install Forge for.
- Under the Installer section for that version, click the “Installer” link to download the Forge installer JAR file.
- Save the downloaded JAR file to an accessible location like your Downloads folder.
Step 2: Installing Minecraft Forge
For Windows Users:
- Locate the downloaded Minecraft Forge .jar file and open it.
- Within the opened program, ensure ‘Install client’ is selected.
- Confirm the installation directory (it should point to your Minecraft directory).
- Click ‘OK’. After a few moments, you should see a message indicating a successful installation.
For MacOS Users:
- Locate the Forge .jar file you downloaded and open it.
- If you encounter an issue opening the file, navigate to ‘System Preferences’ > ‘Security and Privacy’.
- In the ‘General’ section, locate the app and click ‘Open Anyway’.
- Once the file is open, ensure ‘Install client’ is selected.
- Verify the installation directory and click ‘OK’. You should soon see a success message.
Step 3: Launching Minecraft with Forge
- Open the Minecraft Launcher.
- Change the profile to ‘forge’.
- When the game loads, you’ll notice a new ‘Mods’ menu on the start screen, indicating that Forge is active.
Using the CurseForge App (Alternative Method)
If you prefer a more direct and simple process, the CurseForge app offers a simplified way to install and use Minecraft Forge:
- Download and install the CurseForge app depending on your operating system/Device.
- Inside the app, click the ‘Create Custom Profile’ button.
- Enter a name for your profile and select your Minecraft version.
- Set the ‘Game Type’ to Forge. Optionally, you can choose a specific version of Forge.
- Click ‘Create’.
- Now, you can select your custom profile within the app and click ‘Play’.
Troubleshooting Common Issues
Java/JDK Error:
If you encounter error while launching Minecraft with Forge such as JAVA errors make sure you have the latest version of Java installed. If the problem persists, try restarting your computer.
Unidentified Developer Error on MacOS: By default, MacOS restricts files from unidentified sources. To bypass this, go to ‘System Preferences’ > ‘Security & Privacy’ and allow the app to open.
Missing Modded Profile:
If you can’t find your modded profile in the Minecraft launcher, click on the ‘Installations’ tab and check the ‘Modded’ box.
With Minecraft Forge installed, you’re now ready to dive into the world of mods and enhance your Minecraft experience. Whether you’re looking to add new creatures, dimensions, or tools, Forge makes the process seamless. Happy modding!